Quick start
Install Evaluar, scaffold a pipeline, run it, and open the result in the TUI — in five minutes.
This page takes you end-to-end: install, scaffold, run, inspect. The same shape applies to OCR and table tasks — just swap detection for the task type you want.
1. Install
Evaluar currently installs from the private GitHub repository. It requires Python 3.10 or later and pulls in dependencies including Textual for the TUI and OpenCV for the bbox editor.
Use the install command that matches your project.
For a uv-managed project with a pyproject.toml:
uv add "evaluar @ git+https://github.com/Koiiichi/evaluar.git"
uv run evaluar --version
For an existing virtualenv / requirements.txt repo with no pyproject.toml:
uv pip install --python .venv/bin/python "evaluar @ git+https://github.com/Koiiichi/evaluar.git"
.venv/bin/evaluar --version
Or with the virtualenv activated:
source .venv/bin/activate
pip install "evaluar @ git+https://github.com/Koiiichi/evaluar.git"
evaluar --version
uv add is for uv projects; uv pip install / pip install is for installing
into an existing Python environment.
If the repository is private in your environment, authenticate first with
gh auth login, or configure a GitHub token that has repository access. If you
already have a checkout, uv add ../evaluar also works. The CLI is registered
as evaluar by pyproject.toml [project.scripts].
evaluar 0.1.0
2. Scaffold a project
evaluar init <task> writes a working eval_<name>.py, an evaluar.yaml manifest, and a default scorer config. Available task types: detection, ocr, table, merged.
  ✓ Created eval_<name>.py  ← development + CI/CD entry point
✓ Created evaluar/configs/<name>.yaml
✓ Created evaluar/ground_truth/<name>_gt.json
✓ Created evaluar.yaml
The generated eval file looks roughly like this (trimmed for clarity):
from evaluar.api import detection, suite

_SAMPLE_ID = "sample_001"

def _my_model(image_url: str) -> dict:
    # Stub — replace with your real model call.
    return {
        "prediction": [
            {"label_name": "example_class", "box": [100.0, 100.0, 900.0, 900.0], "score": 0.92},
        ]
    }

_GT = {
    _SAMPLE_ID: {"objects": [{"label": "example_class", "bbox": [100.0, 100.0, 900.0, 900.0]}]},
}

_INPUTS = {_SAMPLE_ID: {"image_url": "path/to/sample.png"}}


def build_suite(sample_ids=None, config=None):
    ids = sample_ids or [_SAMPLE_ID]
    pipeline = (
        detection("my_model")
        .callable(_my_model)
        .inputs(_INPUTS)
        .ground_truth(_GT)
        .default_mapping()
        .build()
    )
    s = suite(sample_ids=ids, suite_name="my_model")
    s.add_pipeline("my_model", pipeline)
    return s


if __name__ == "__main__":
    result = build_suite().run(save=True)
    print(f"Run {result.run_id}: {result.rollup_scorecard.verdict.value}")
The build_suite(sample_ids, config) function is the contract Evaluar expects. The CLI calls it; you can also run the file directly with python eval_layout_detector.py.
sample_001 is the id for one evaluation case. It is the key that connects _INPUTS, _GT, suite(sample_ids=...), and the per-sample scorecards you inspect later. Replace it with ids from your own dataset as soon as you move beyond the scaffold.
Replace the stub _my_model with your real model call. It can be a local
function, an HTTP request, anything callable. Evaluar treats the model as
a plain Python callable.
3. Run the evaluation
Run from the shell
The CLI imports the eval file, calls build_suite(...), executes it, and
saves the result to evaluar/results/<run_id>.json.
Or run it as a script
python eval_layout_detector.pyProduces the same evaluar/results/<run_id>.json. This path is the
one CI typically takes (see Headless / CI).
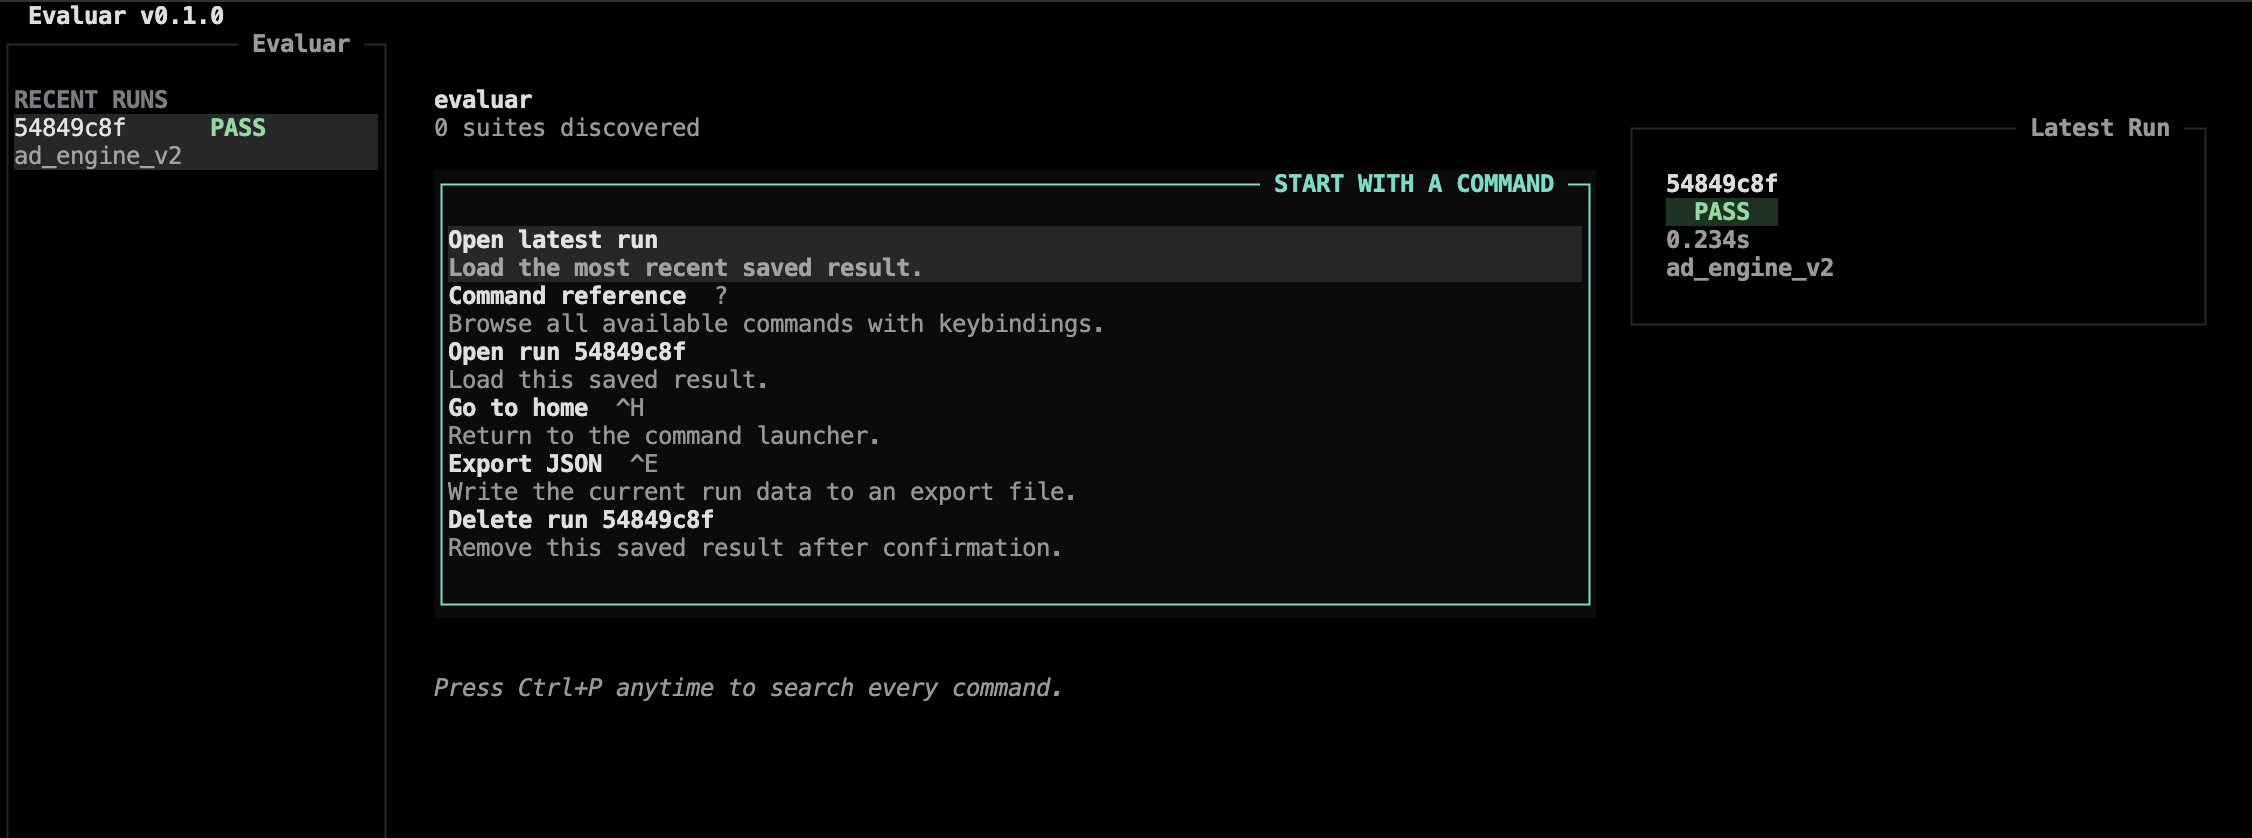
4. Open the run in the TUI
Run evaluar with no arguments. The home view lists every run in evaluar/results/:
To open a specific run directly without going through the home view:
A few keys worth knowing immediately. They are verified against src/evaluar/tui/views/results.py:
| i | Open the failure inspector |
| o | Open the bbox overlay (read-only) |
| v | Open the bbox editor (edit ground truth) |
| g | Toggle the charts widget |
| ? | Show the command reference |
| ctrl+c | Quit |
The full reference lives on the keymap reference page.
5. Inspect failures
Press i to enter the failure inspector. Inside the inspector, focus the diff pane (d) or the sample list (s); press tab to cycle.
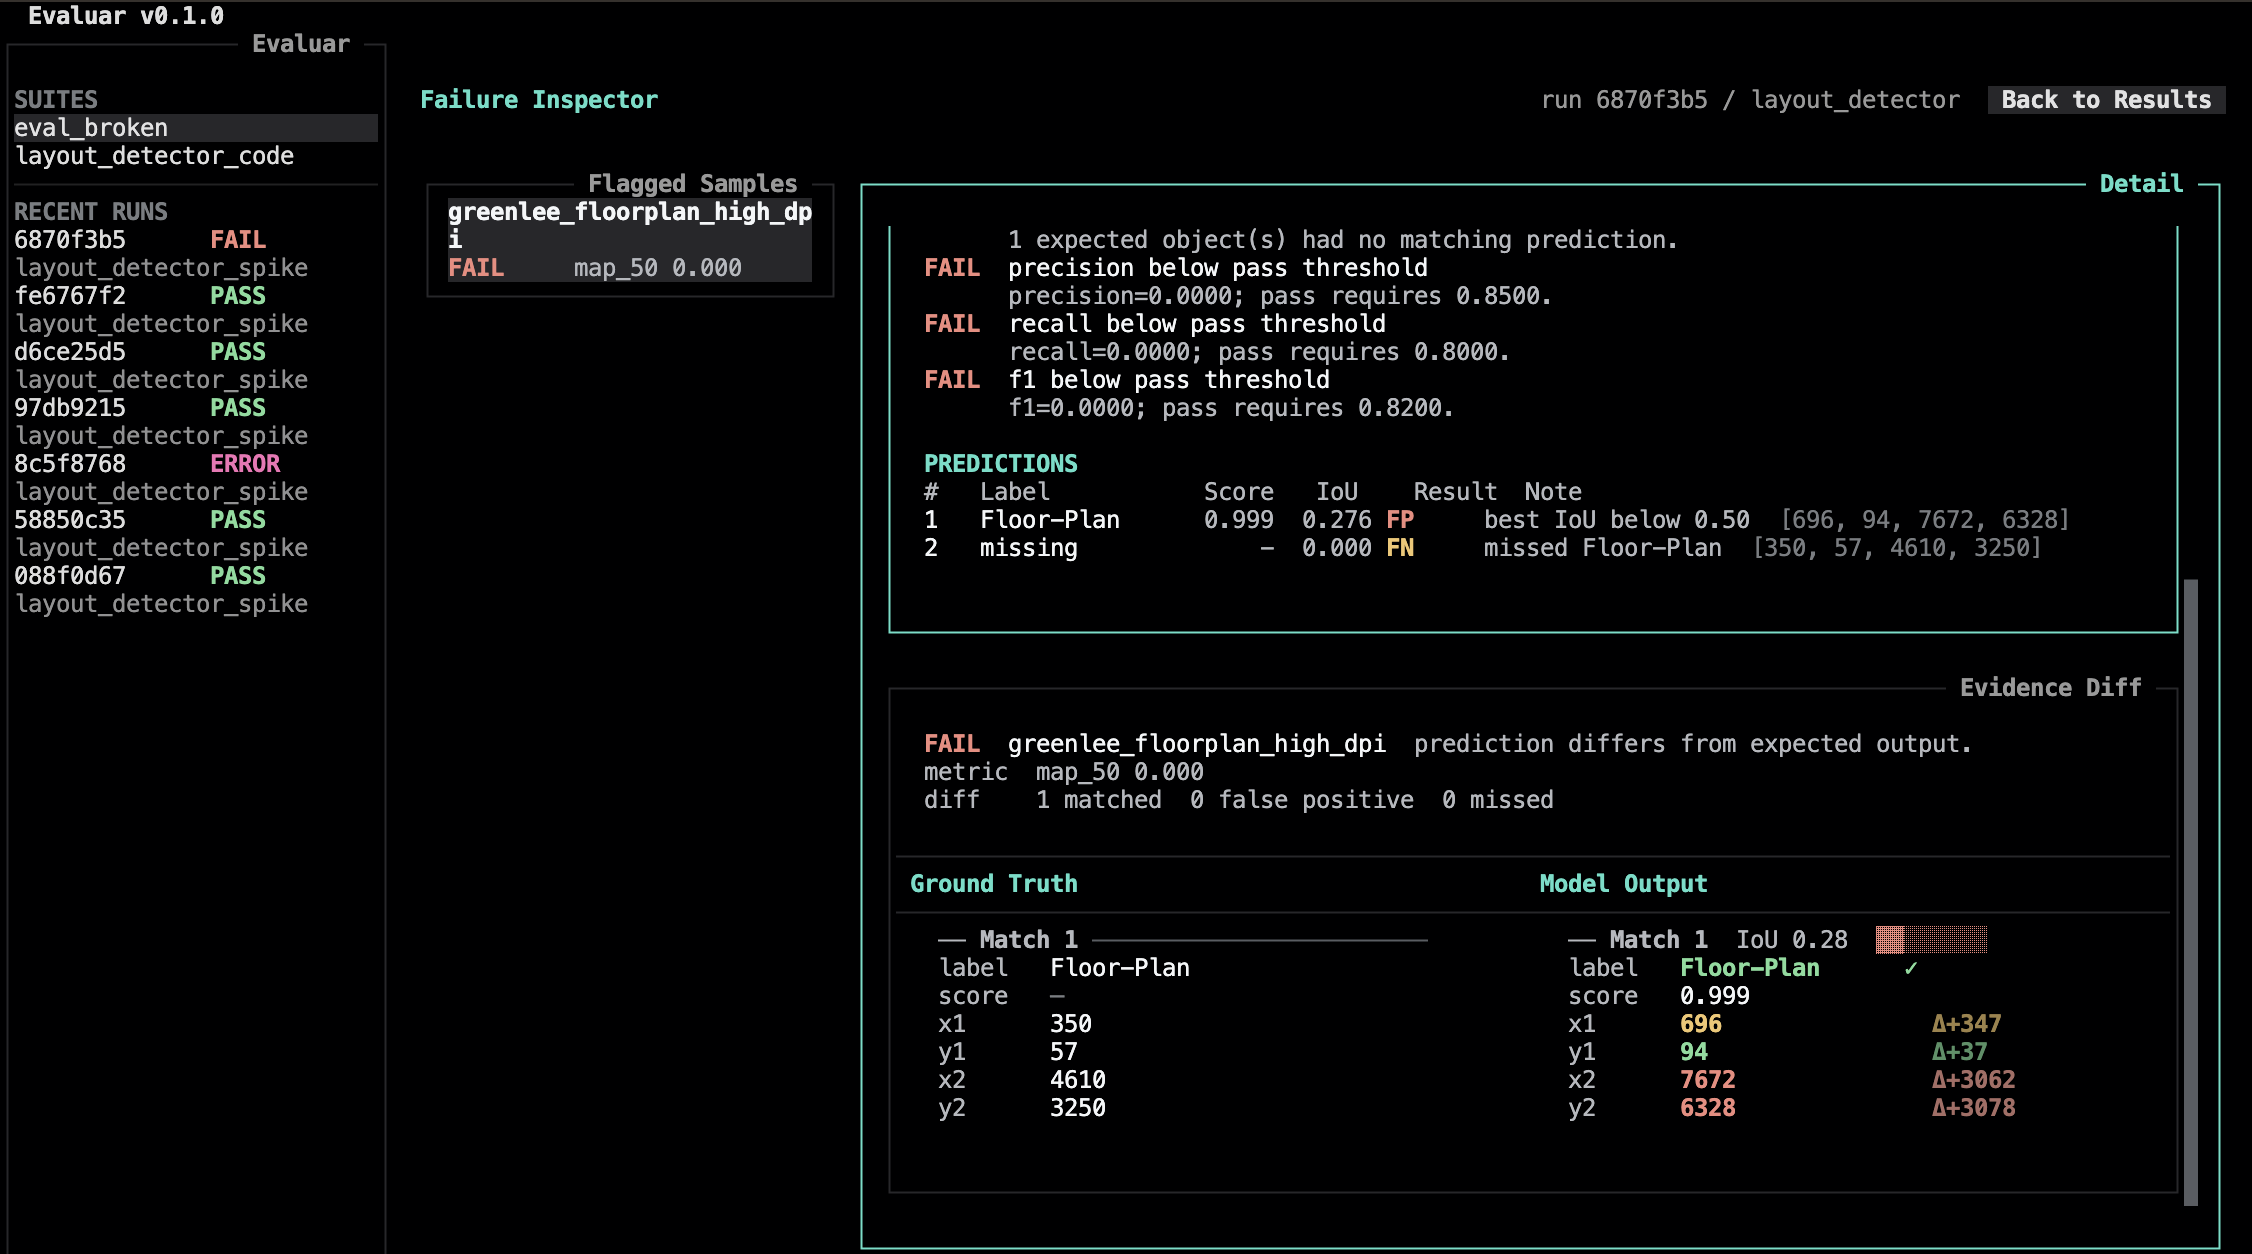
To look at predictions on the source image, press o from either the results view or the inspector. Evaluar launches the bbox editor as a separate OpenCV window (see Bbox editor) — overlay mode is read-only; press v instead to edit ground truth.